Creating an open-concept design in your home can significantly enhance the flow and functionality of your living space. One common challenge in achieving this is removing a load-bearing wall and installing a support beam. This structural engineering blog post will guide you through the step-by-step process of safely and effectively removing a load-bearing wall and installing a support beam for your open-concept design.


Importance of Getting a Structural Engineer
When it comes to making structural changes to your home, it is essential to hire a qualified structural engineer. This is because only a structural engineer has the expertise and liability insurance to create engineering designs that meet safety standards and comply with the Ontario Building Code. Be on alert for contractors who say they can guarantee the safety of your home. To identify load-bearing walls, see our guide HERE.
Whether you are planning to add an extension, remove a load-bearing wall, or modify the layout of your home, a structural engineer will assess the existing structure, consider the requirements of the Ontario Building Code, and create a design that meets your specific requirements. Additionally, a sound engineer can provide installation options to lower costs and make your contractor happy.
You can check the validity of your engineer’s license here: PEO Licence Checker
Safety First: Structural Changes to Your Home
Safety should be the top priority when making structural changes to your home. A structural engineer plays a critical role in ensuring that the modifications are carried out safely and do not compromise the structural integrity of the building.
Structural engineers analyze the loads, forces, and stresses that a structure may encounter and design systems that can handle these forces. They consider the materials used, the weight-bearing capacity of the foundation, and the overall structural stability for a wall removal. By doing so, they ensure that the changes made to your home will not result in structural failures or pose a risk to the occupants.
Ultimately, hiring a structural engineer is essential to protect the safety and integrity of your home. Their expertise and knowledge in engineering design ensure that any structural changes made to your house are done correctly and in OBC compliance. So, if you are planning any structural modifications, consult a qualified structural engineer to ensure the safety and stability of your home.
Step 1: Creating Temporary Support
In any home renovation, there may come a time when you need to remove a wall. However, removing a load-bearing wall can be risky if not adequately supported. This is where creating temporary support comes into play. By following the proper steps, you can ensure the safety and stability of your structure during the wall removal process.
Build a Temporary Shoring Wall
Building a shoring wall is one of the first steps in a wall removal renovation. This wall acts as a temporary support structure, holding the floor in place while the wall is removed. To build a shoring wall, measure the length and height of the area where the wall will be removed. Then, cut and assemble the necessary lumber to create the framework of the shoring wall. Ensure that the wall is securely anchor to the floor and ceiling to provide reliable support.
Install Temporary Top and Sill Plates
Once the shoring wall is in place, installing temporary top and sill plates is essential. These plates act as temporary replacements for the ones that will be removed along with the wall. Use a level to align the top and sill plates perfectly. This will make it easier to measure and tape in the studs for the new wall that will replace the one being removed.
By creating temporary support before removing a wall, you can minimize the risk of structural damage or collapse. Remember to consult with a professional if you have any concerns or doubts about the process. With the proper precautions, you can safely carry out your construction project with confidence.
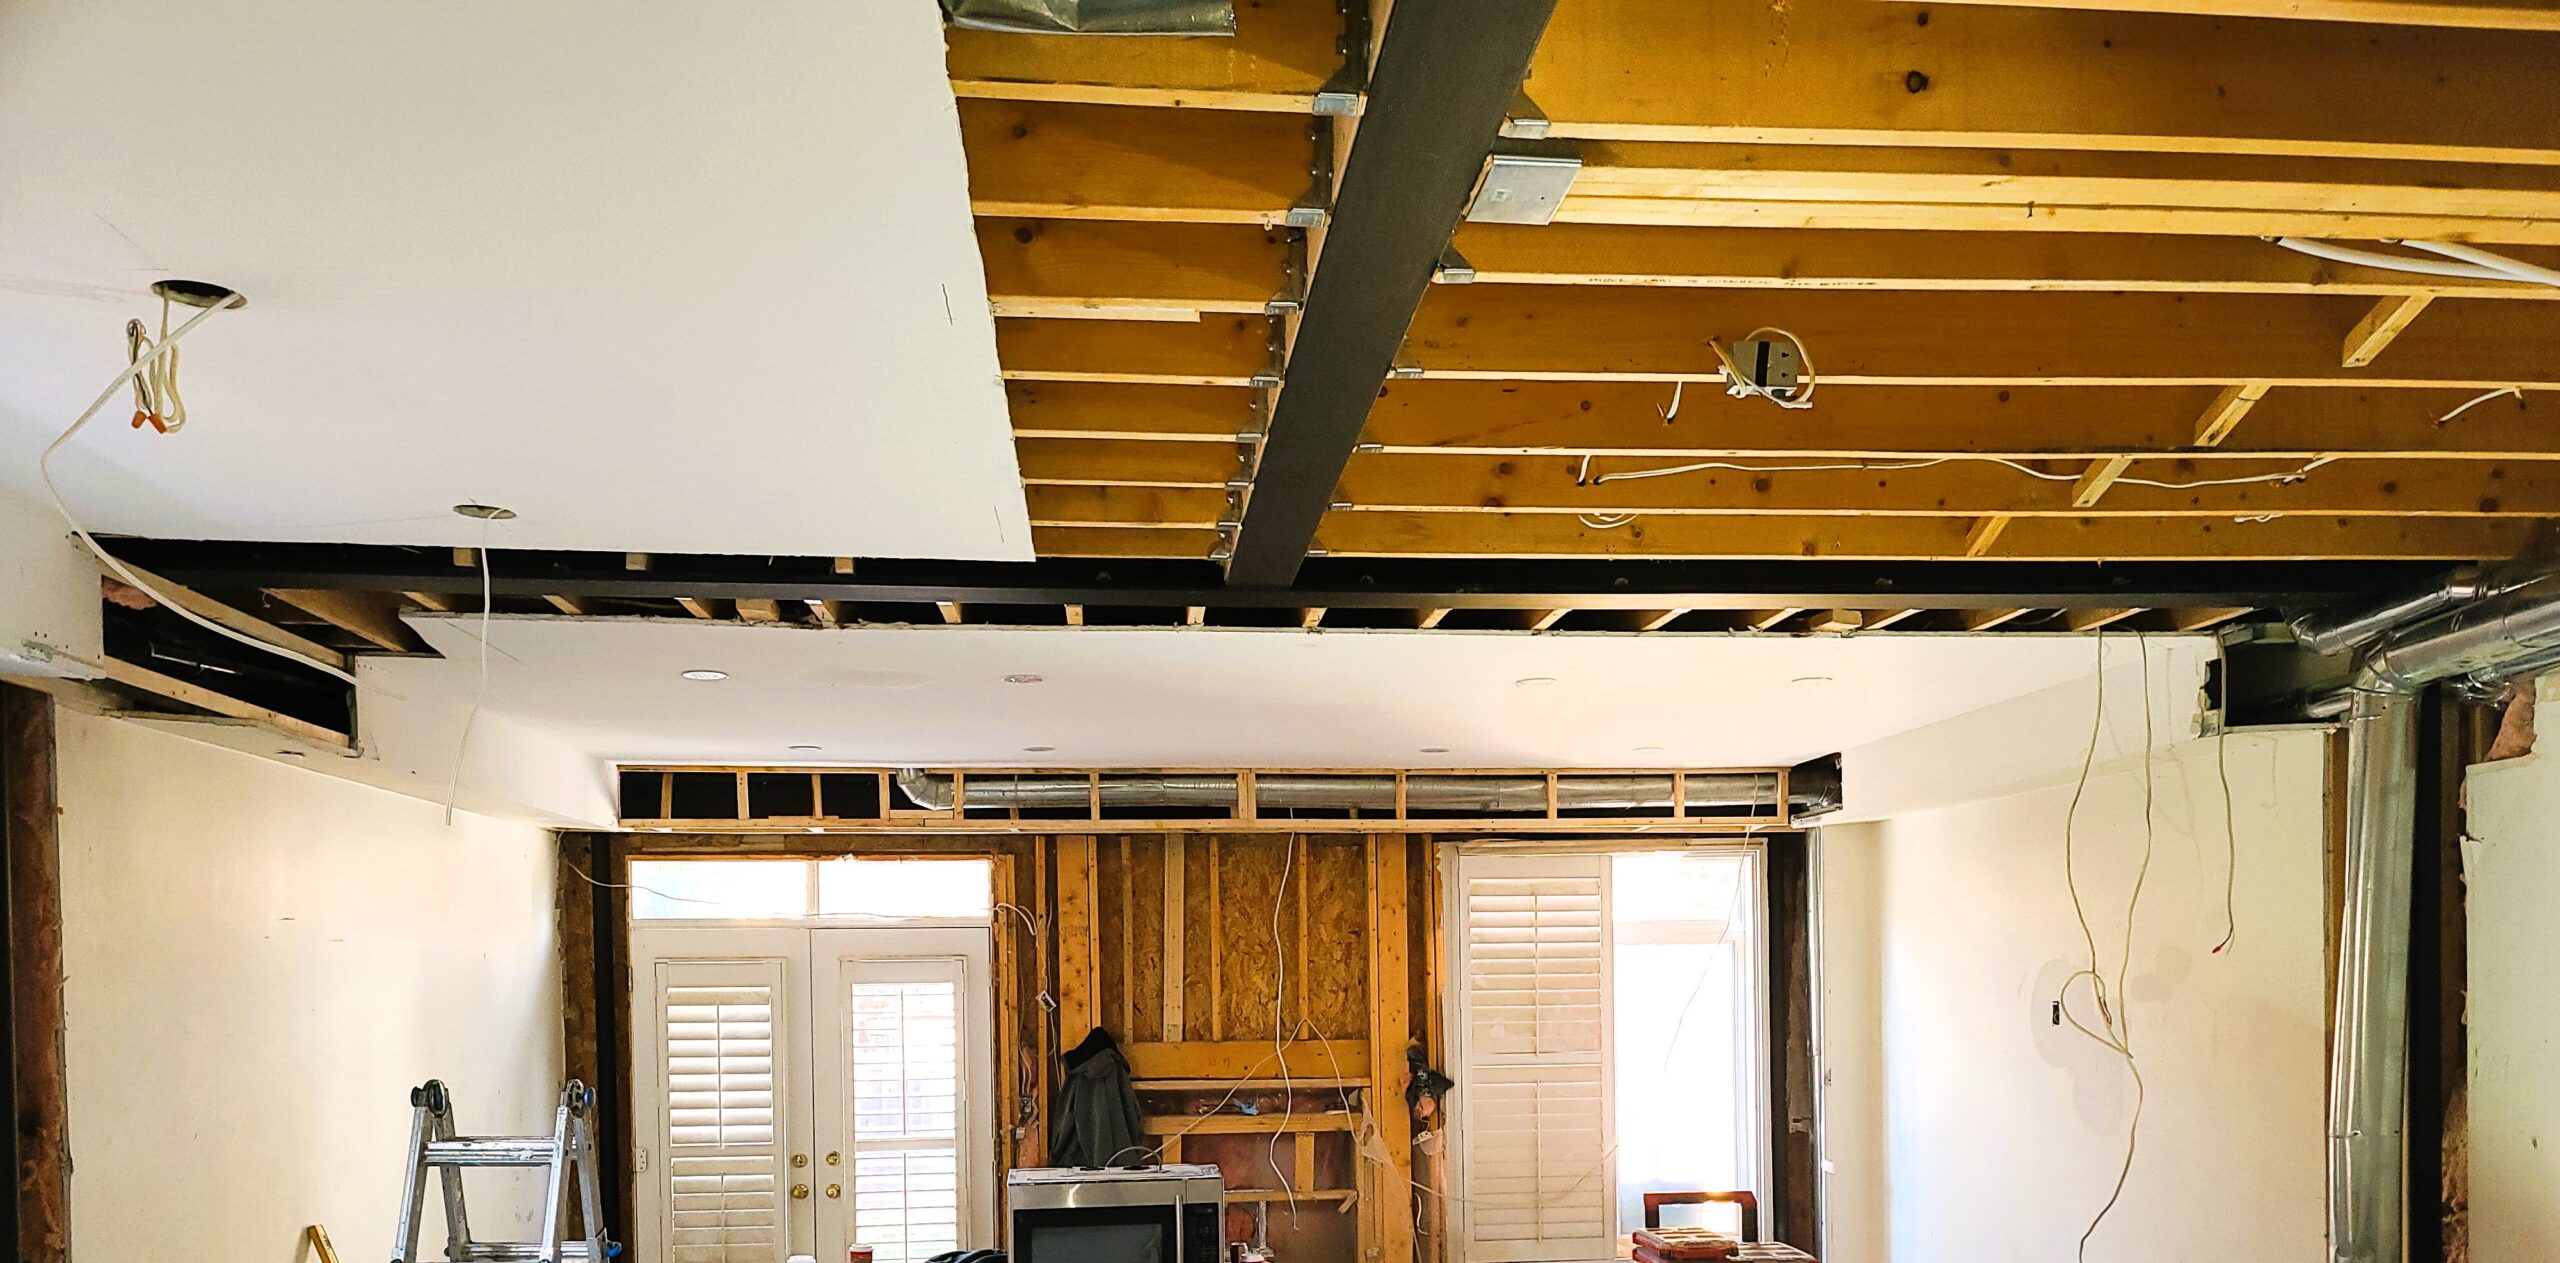
Step 2: Demolishing the Wall
The demolition phase is a crucial step in any home renovation project. It is the process of tearing down the existing structures or walls to make way for new changes. In this blog section, we will discuss two key steps to effectively demolish a wall and prepare the space for the installation of a new beam.
Avoid the Hammers; use a corded reciprocating to demo the wall.
The first step in demolishing a wall is to use a corded reciprocating saw. A reciprocating saw is a versatile power tool that can cut through a wide range of materials, including wood, metal, and plastic. Start by locating the studs within the wall using a stud finder. Once you know where the studs are, use the saw to cut through the drywall along the edges of the wall, revealing the wooden studs beneath.
Once the drywall is removed, carefully cut through the studs using the saw, making sure to leave enough space for the new beam. Take extra caution while removing the studs, as they may be connected to electrical wiring or plumbing. Remember to wear safety goggles and gloves to protect yourself from flying debris during this process.
Remove the post and headers to make way for the new beam.
After removing the studs, the next step is to remove any posts and headers that might be present. These structural elements are often used to support the load of the wall or the floor above. Use a reciprocating saw or pry bar to carefully remove them, taking care not to damage the surrounding areas.
Once all the necessary elements have been removed, the space will be ready for the installation of the new beam. Remember to consult a structural engineer or a professional contractor to determine the appropriate size and material for the new beam, as it will play a vital role in supporting the structural integrity of the space.
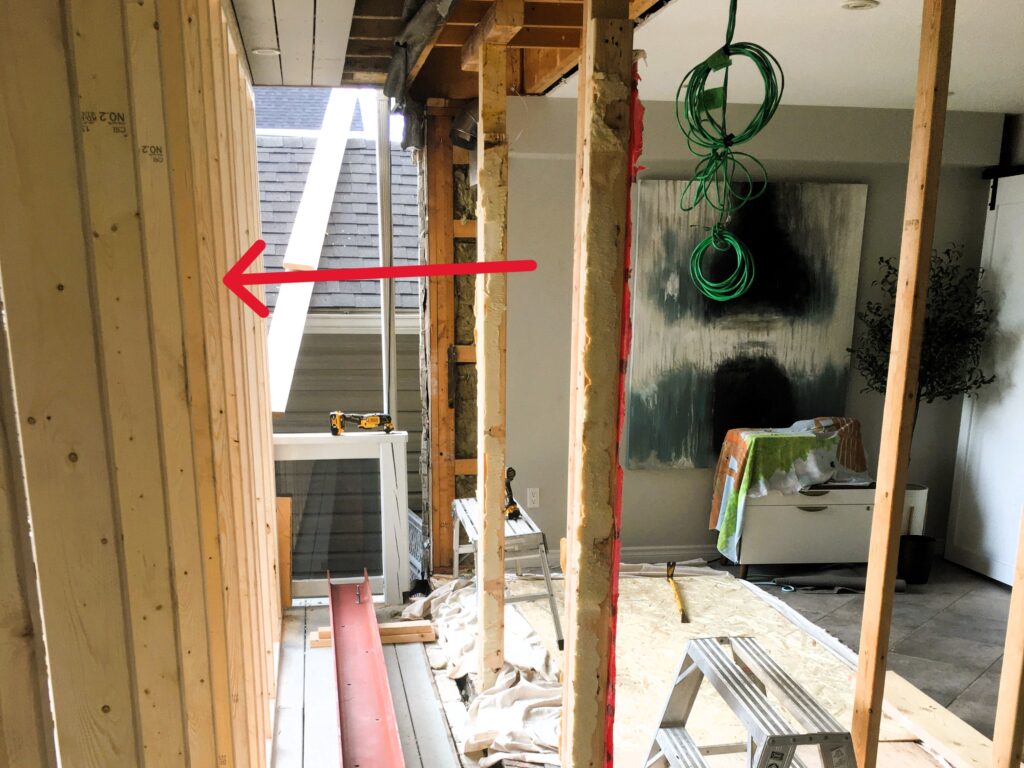
Step 3: Preparing for the New Beam
To successfully install a new beam, it is essential to prepare the existing framing properly. This involves disassembling the current structure to create a space or pocket for the new beam, as well as marking the cut line for the existing studs.
Marking the Cut Line for the Existing Studs
This will create a guide for cutting and removing the studs to accommodate the new beam. Using a snap line or a laser level, accurately mark the desired location for the cut line, ensuring it aligns with the dimensions of the new beam.
Double-check measurements and take into consideration any obstructions or structural elements that may affect the installation process. These initial steps are crucial in ensuring a successful and seamless transition to the new structural support system.
Wall Removal Beam Selection – Steel vs LVL
Choosing between steel beams and laminated veneer lumber (LVL) beams is a significant decision when doing a wall removal. Steel beams are known for their strength and versatility, providing excellent support in large openings and multi-level structures. On the other hand, LVL beams offer a cost-effective solution with high load-bearing capabilities. Choosing the right beam for your project depends on factors such as the span, load requirements, and overall design goals.
A structural engineer will help you with this selection. Consulting with a contractor regarding installation cost differences will also be necessary.
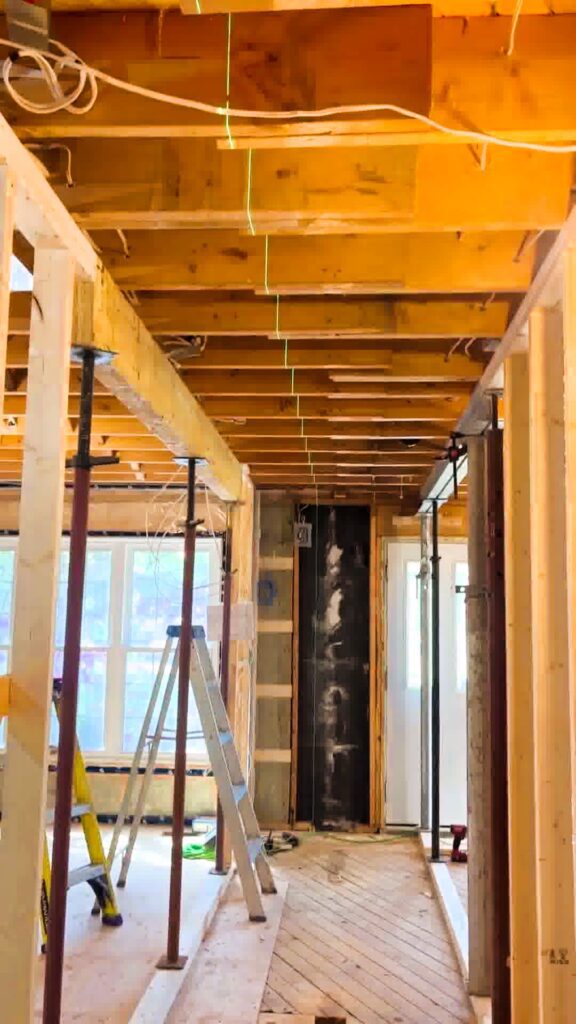
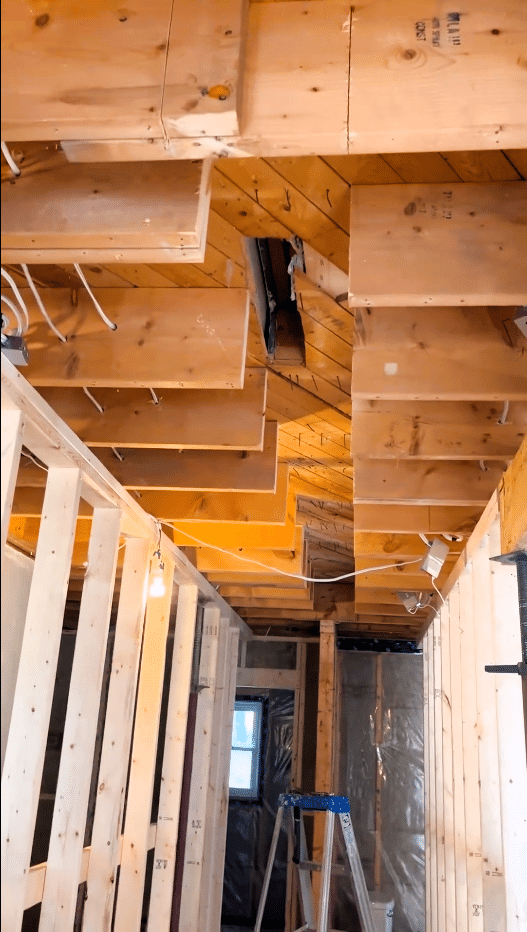
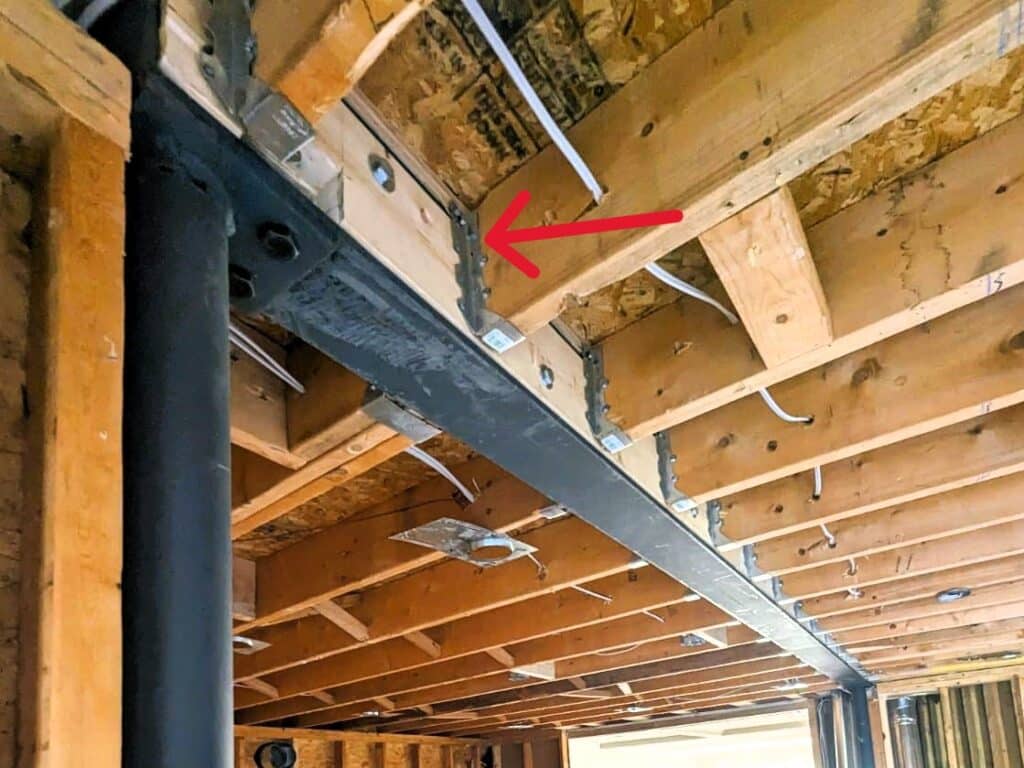
Step 4: Installing the Support Beam
The first step in installing a support beam is to pack the beam adequately. If steel is used, it will look like the image above. Careful measurements and precise cuts are necessary to ensure a snug fit.
Wall Removal Best Practice. The Packed I-Beam
Using a steel I-beam is often the only way to get a flush ceiling finish. However, this can make attaching the existing floor joists difficult. Pack the steel I-beam with lumber to allow for easy attachment of the joist hangers.

Lift the beam into place using a genie lift and secure it with nails and hangers.
With the new beam prepared, it is time to lift it into place. A genie lift or similar hoist can raise the beam safely to the desired height. Once in position, secure the beam using the engineer-designed posts.

Step 5: Finishing the Wall Removal Framing
Ensure structural integrity by adding blocking and joist hangers. Add steel joist hangers or blocking (the installation of horizontal wood pieces between the studs or joists) to prevent lateral movement of the joists and to prevent twisting or warping of the framing members.
Most Popular Renovation Projects in Oakville, Burlington, and Mississauga
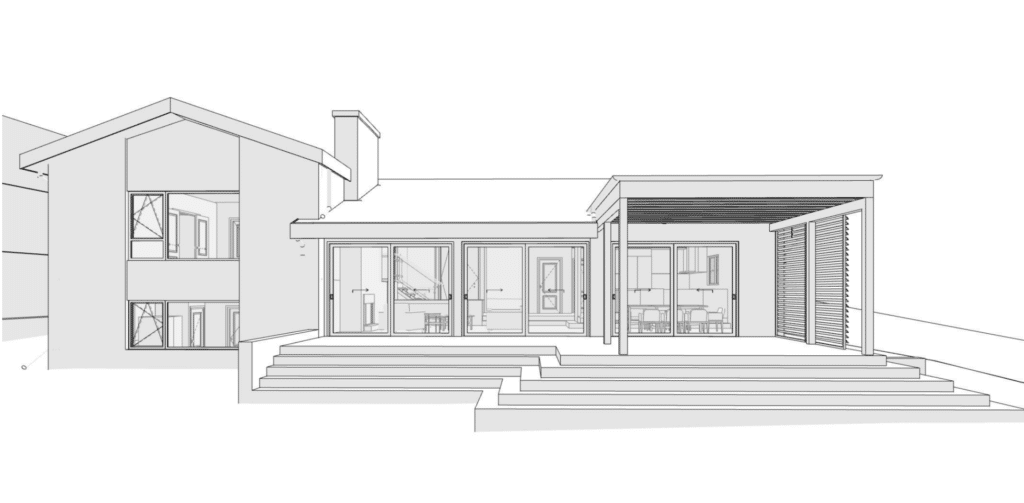
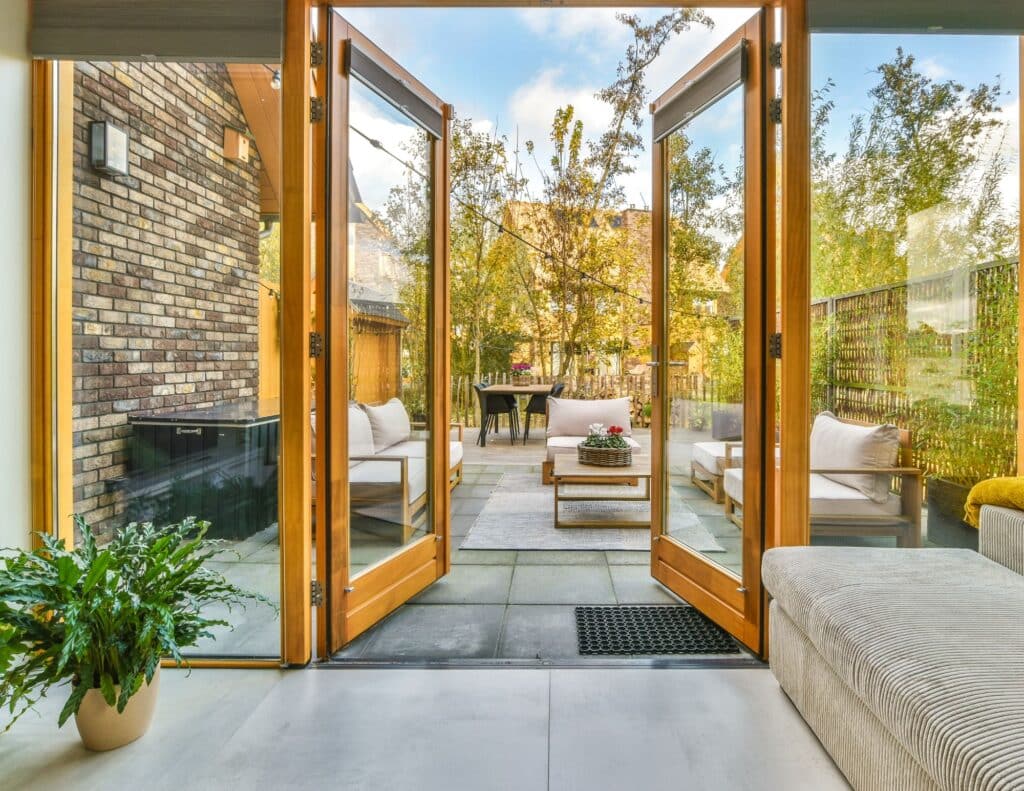
An upgrade from the standard wall removal, expanding rear patio doors is an increasingly popular home improvement project in Oakville, Ontario, as homeowners seek to blend their indoor and outdoor living spaces. This trend is driven by the desire for more expansive and versatile areas that can be enjoyed year-round, creating a seamless transition between the home’s interior and the backyard or garden.
The key to this transformation is the removal of a larger section of the rear exterior wall. This process involves careful planning and execution, as it usually requires the removal of load-bearing structures. To maintain the structural integrity of the home, a robust support system must be installed. This is typically achieved by placing a structural beam in the area where the wall is removed. The beam must be adequately sized and supported to carry the load that was previously supported by the wall.

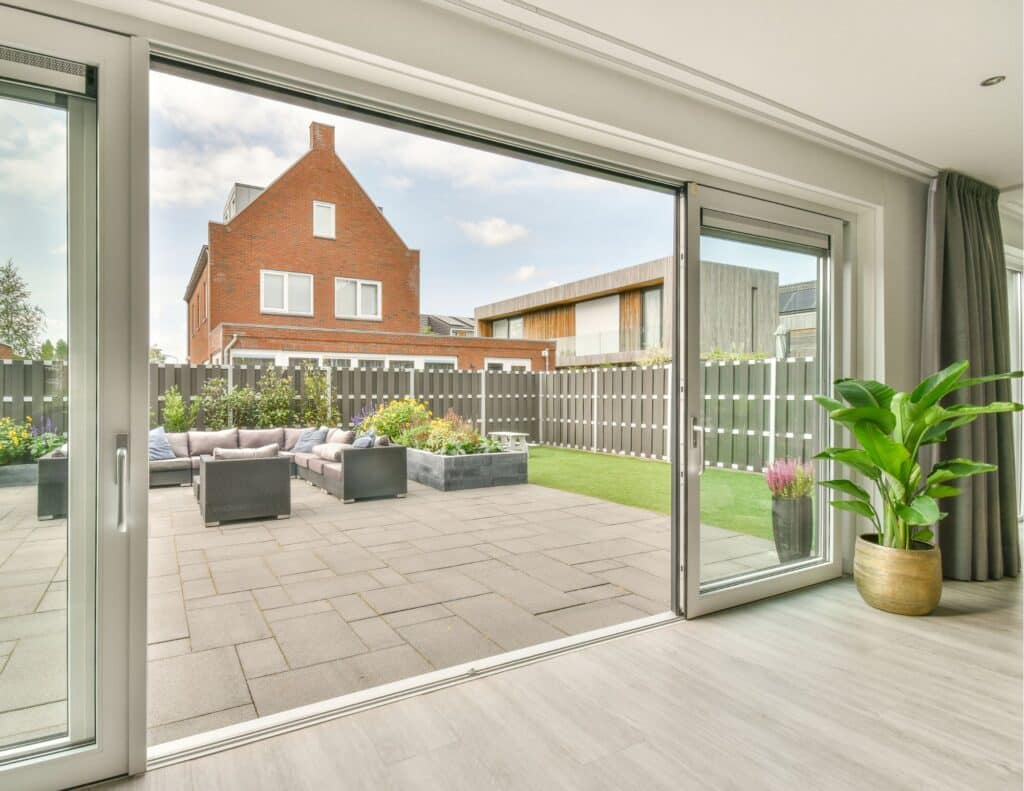
Once the structural modifications are completed, homeowners have the option to install large sliding patio doors, with sizes ranging from 12 feet to a grand 20 feet. These expansive doors not only enhance the visual appeal of the space but also improve functionality. Large sliding doors allow for more natural light to enter the home, create a sense of openness, and offer unobstructed views of the outdoor area.
Rear Patio Door Expansion Inspiration for You
The result of this renovation is an ultra-modern style that is sure to impress visitors. The expanded patio doors not only improve the aesthetic appeal of the home but also potentially increase its market value. This kind of renovation is particularly attractive in areas like Oakville, where homeowners value stylish, contemporary home designs that effectively merge indoor and outdoor spaces.
For homeowners in Ontario considering this type of renovation, it’s important to consult with professionals who can assess the feasibility of the project, ensure compliance with local building codes, and provide expert guidance throughout the process. With the right planning and execution, expanding rear patio doors can transform a home into a more spacious, light-filled, and modern living space.
-

Transom windows above this Oakville reno add more light. -
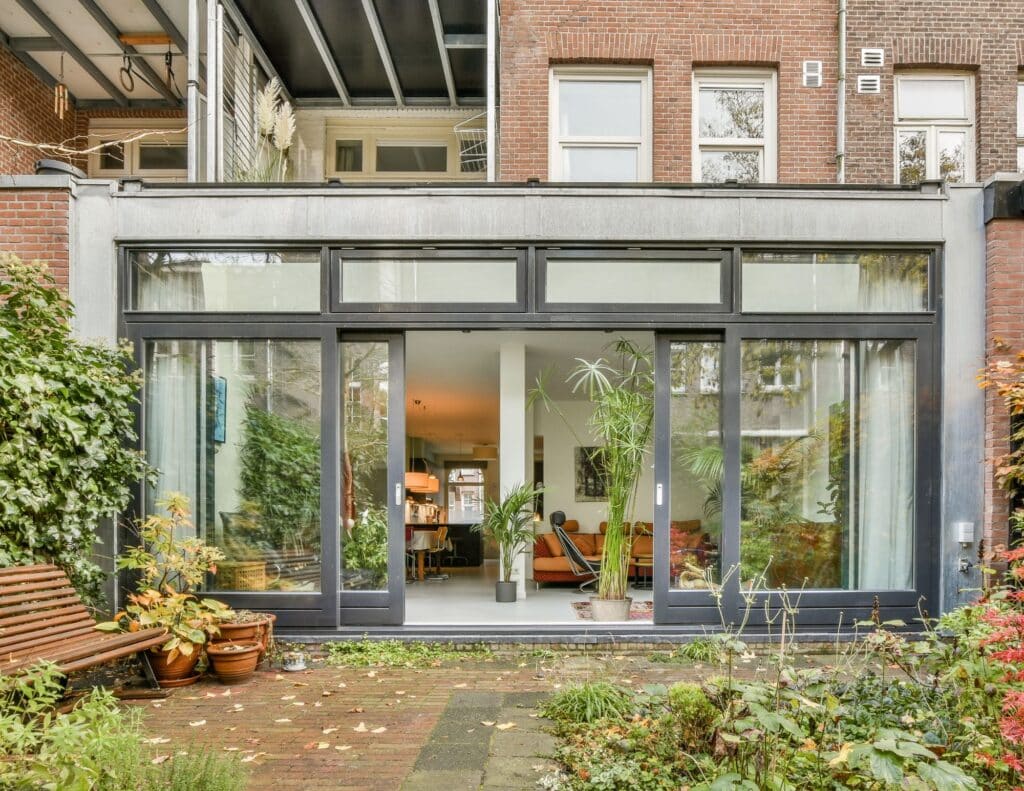
Popular in Toronto, the entire rear wall is removed for a patio door. -
Fully open to backyard. Note the flush floors. An engineering design is need due to the brickwork weight. -
Classic and Modern. -

Outdoor dining with this patio door upgrade. -

Best way to appreciate the outdoors year round. -

Larger patio doors closed. A structural beam is needed above. -

At night, the new patio doors transform the home. -
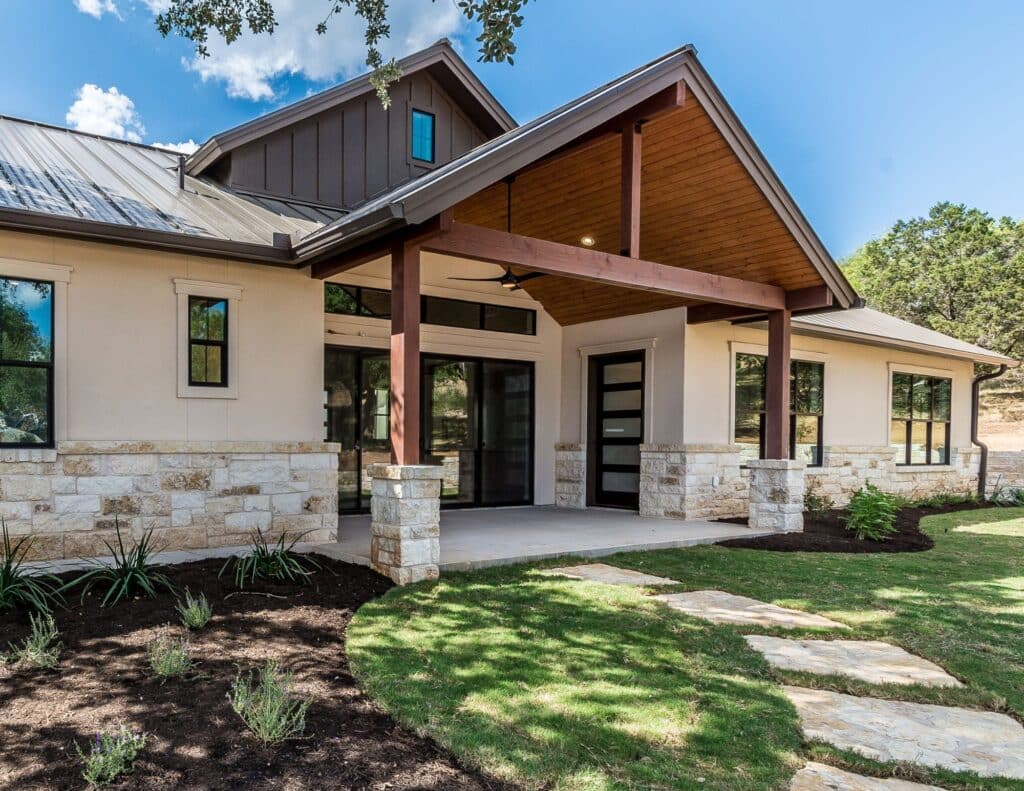
Rear Covered Patio with larger sliders.
Benefits of Open Concept Living
Open-concept living has gained significant popularity in recent years. This wall removal renovation creates a spacious and airy feel in the home. Homeowners enjoy the freedom and flexibility of open-concept living as it encourages socializing, enhances natural lighting, and allows for better traffic flow. It is also an ideal solution for families who want to keep an eye on their children or entertain guests without feeling isolated in separate rooms. Whether you have a small or large space, open-concept living can transform your home into a modern and welcoming environment. If you have questions about the process, reach out to our engineering team HERE.
TL;DR
When it comes to popular projects in Oakville, Burlington, and Mississauga, homeowners are opting for open-concept living. Steel beams offer strength and versatility, while LVL beams provide a cost-effective solution. Expanding the rear patio doors gives a modern feel and maximizes outdoor enjoyment. Open-concept living promotes a spacious and airy feel, enhancing socializing and natural lighting.